Exporting and importing neurons
In this tutorial, we’ll go over how to export and import traced neurons from/to Horta.
Prerequisites
- You should be able to log into HortaCloud and launch the Horta application, as detailed in the first tutorial.
- You should be able to open a workspace in 3D and navigate the data, as detailed in the second tutorial.
- You should be able to create and add points to a neuron, as detailed in the third tutorial.
Steps
Open the workspace
Launch HortaCloud and open the workspace created in the previous tutorial, or any other workspace that you can trace in.
Exporting neurons as SWC files
Once you’ve finished tracing a neuron, you will probably want to export the data for analysis or visualization in another piece of software. Horta supports import and export to the standard SWC file format. Details of the SWC format can be found in the “Reference” section.
To export a traced neuron:
- Right click on its name in the neuron list and choose “Export SWC File”. A file dialog box will open.
- Name the file whatever you like. An extension of “.swc” is strongly recommended. The two options on the right are discussed in the “Basic Operations” section. The defaults are appropriate almost all of the time.
- Choose the export location. For desktop, choose any location you like on your hard drive. For HortaCloud, we need to save to an intermediate location first. At the top of the dialog box, click the “Save in” drop-down menu and choose “Temporary Files”.
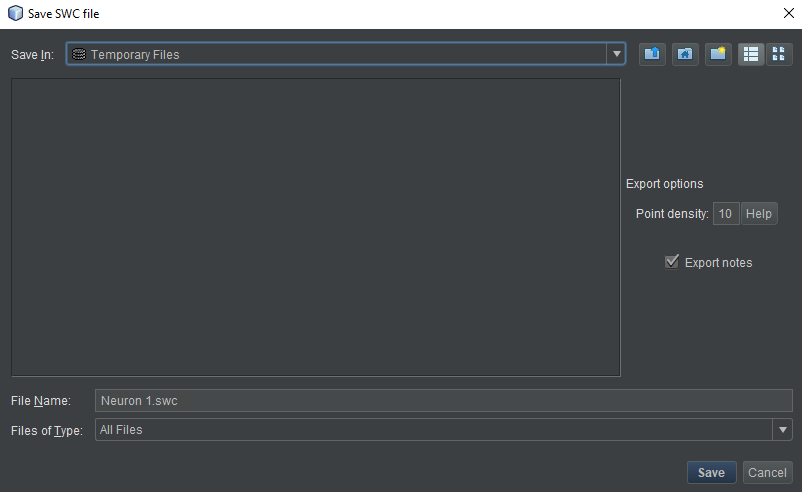
- Click “OK”. A “Background Tasks” window will open with a progress bar. This operation is very fast, and you may not even see the bar before it’s filled. For desktop Horta, you’re done after this step.
- For HortaCloud users, you now need to download your file(s) from the “Temporary Files” location on AppStream. The AppStream toolbar appears at the top of the browser’s content window, above the top of the Horta main window. Click the third icon from left, which has a tooltip of “My Files”.
- In the new dialog box that opens, click “Temporary Files”. This is a web view into the folder where you exported your neuron. At the right end of the row for each file in this directory is a downward facing chevron. Click it and choose “Download” from the drop-down menu. Depending on your browser, you may be prompted to choose a location, or the file may be downloaded to your default downloads location. Also depending on your browser, you may need to authorize or confirm the download from the AppStream site.
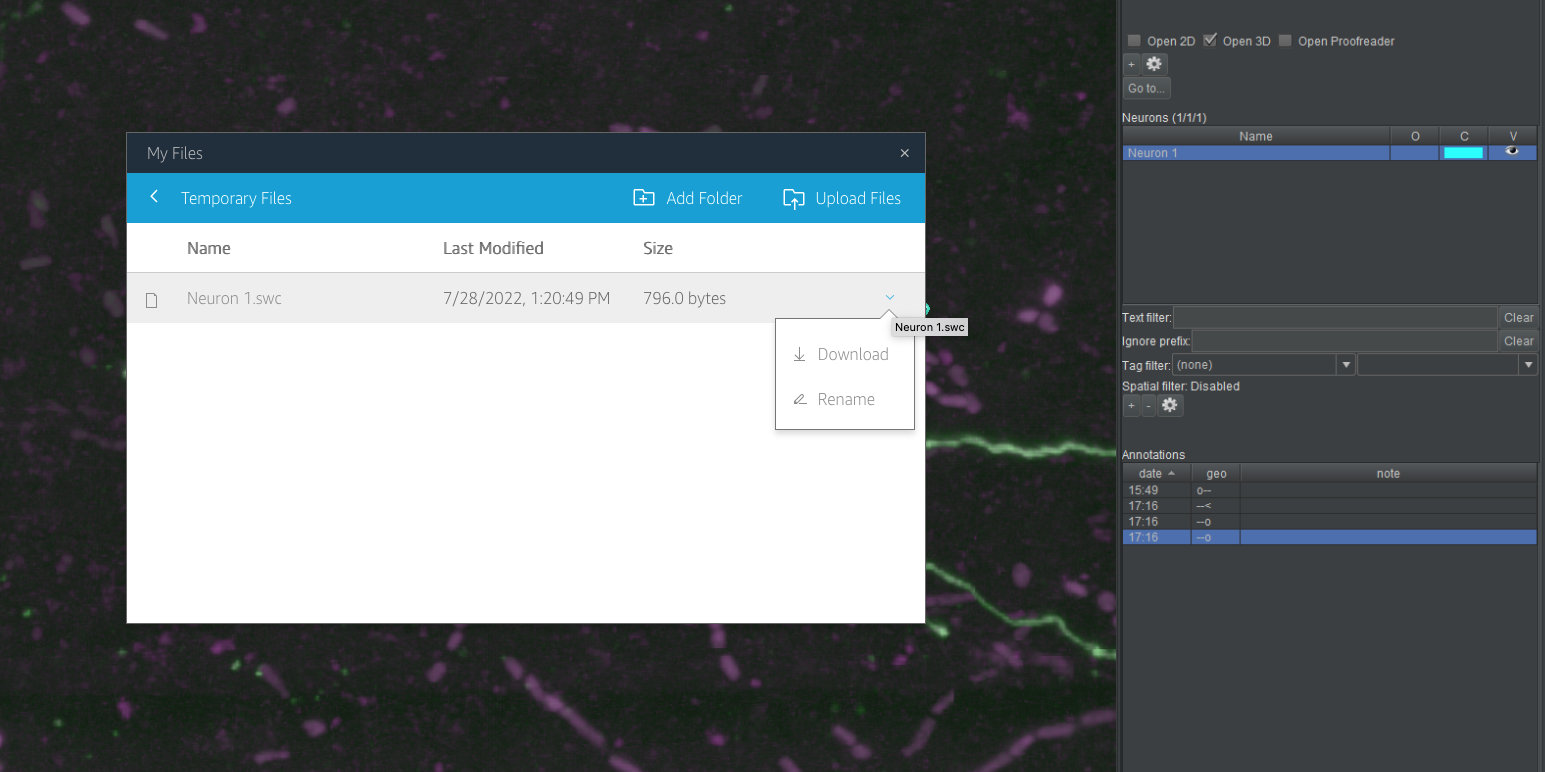
Temporary means temporary!
The name “Temporary Files” is accurate! The files in this location will be deleted when your session ends. You must download any exported neurons to your local computer in the same session in which you exported them.Importing neurons from SWC files
Importing neurons from SWC files is basically the same as exporting, in reverse. Again, the HortaCloud procedure involves an intermediate location.
If you’ve been using the Janelia 2021-03-17 sample for your test, you can download a test neuron to import (right-click and download the linked file). If you don’t have access to the Janelia sample we’re using in these tutorials, you can test importing a neuron into your own sample and workspace by simply exporting any neuron (as in the previous section), deleting the neuron using the “-” button under the neuron list, and then reimporting the same neuron.
To import a traced neuron:
- Open a workspace that corresponds to the same sample the neuron was exported from. In other words, the exported neuron’s SWC file must be using the same coordinate system and same scale as the target sample. If not, the imported neuron will not lie on top of the neuron signal in the images. In many cases, it will be imported somewhere in space far from the brain imagery.
- (HortaCloud only) Upload the SWC file to AppStream. Click the “My Files” icon on the AppStream toolbar (third from left). Click “Temporary Files”. You can drag files directly to this dialog box, and they will be uploaded. Alternately, click “Upload files” and choose the files from the file dialog that opens.
- In Horta, click the gear menu in the “WORKSPACE” section. Choose “Import SWC file as separate neurons”.
- Desktop users may choose any neuron on their hard disk at this point. HortaCloud users should again navigate to the “Temporary Files” area by using the drop-down menu called “Look in” at the top. Either way, choose a neuron SWC file and then click “Open”.
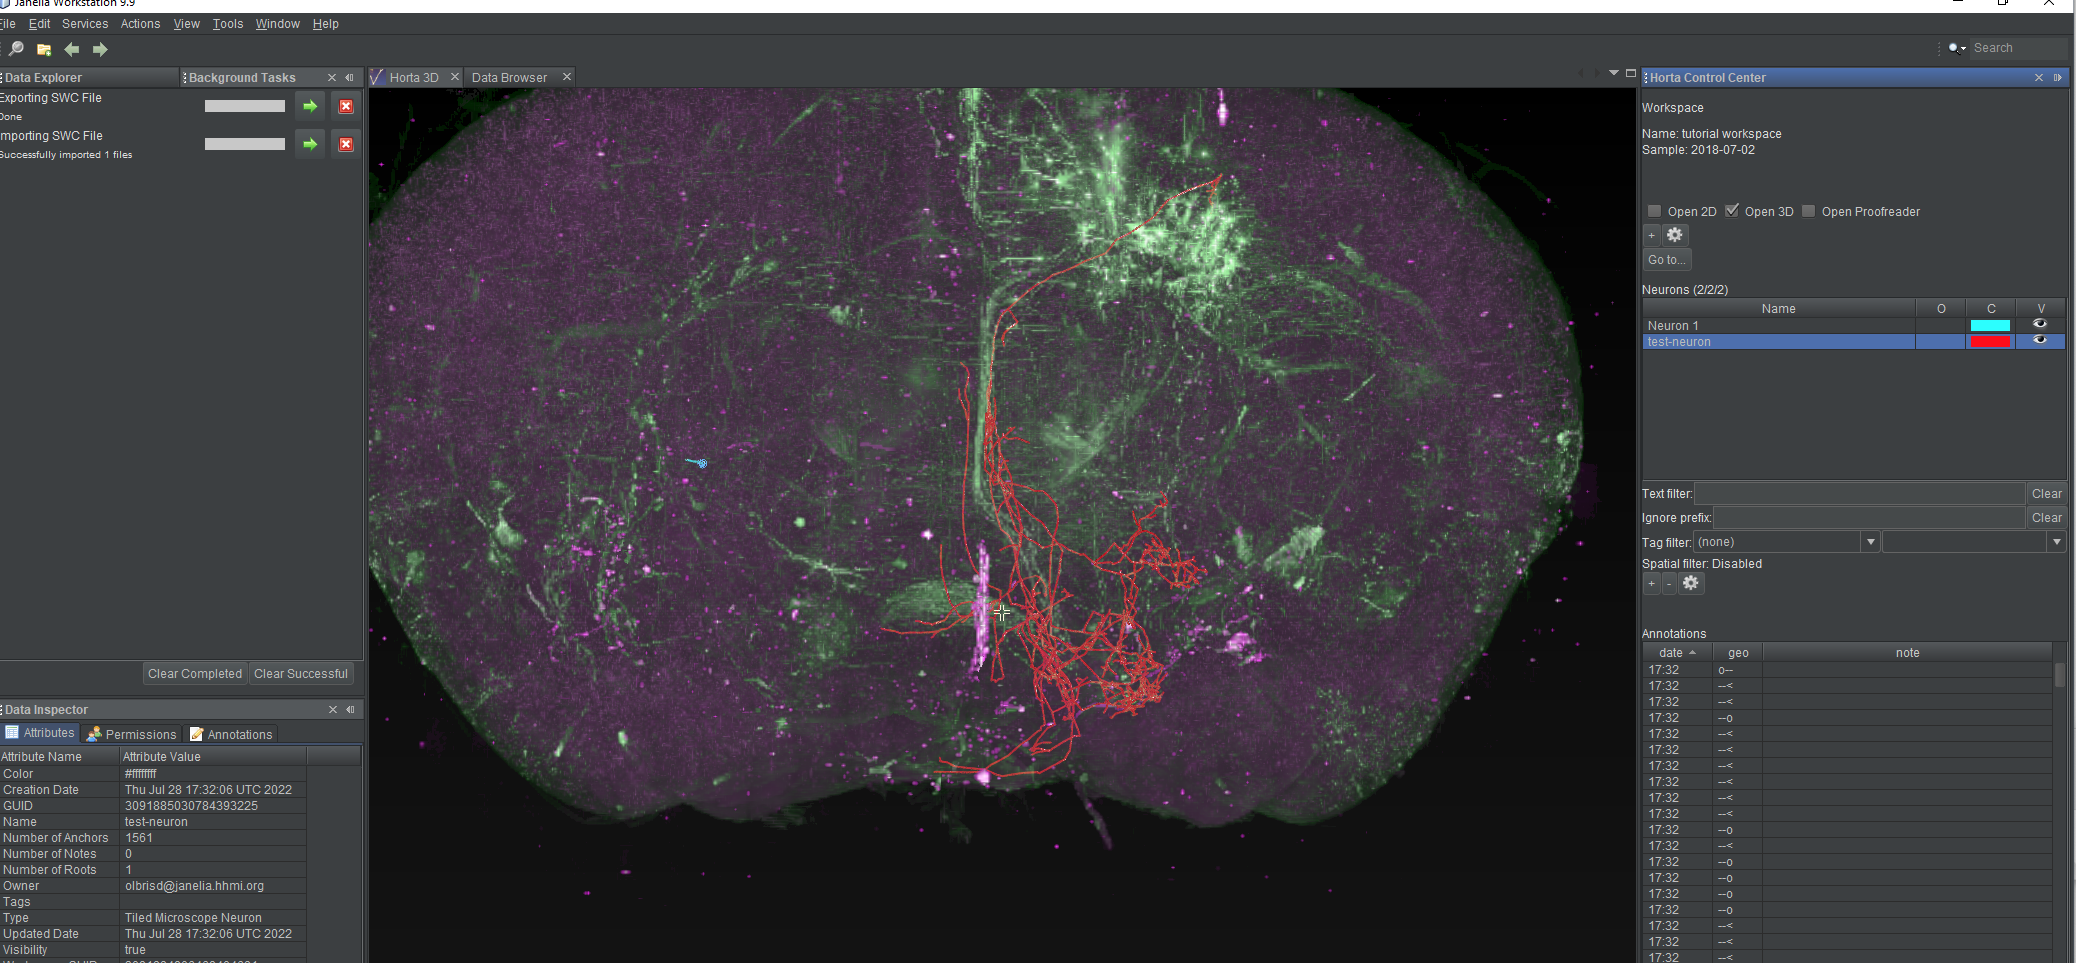
- The “Background Tasks” window will again open, and the neuron will appear in the neurons list, and in the 2D or 3D views, if you have them open.
Once the neuron has loaded, it will be visible in the 3D view, the 2D view (if it’s open), and the neuron list. If you select the test neuron in the neuron list, you’ll see a large number of branch points and endpoints in the annotation list.
Bulk import/export
See the “Basic Operations” section for more information on exporting multiple neurons at once, and on importing multiple neurons either interactive or in a offline batch process.
What’s next
After finishing these tutorials, you may want to read the “Basic Operations” section of the User Manual. This section will cover much of the same material discussed in these tutorials, with a few more details and a few more operations described. The “Features” section lists many less-commonly used tools. The “Reference” section contains details on, for example, file formats. Typically users will rarely need to consult that section.
Feedback
Was this page helpful?
Glad to hear it! Please tell us how we can improve.
Sorry to hear that. Please tell us how we can improve.